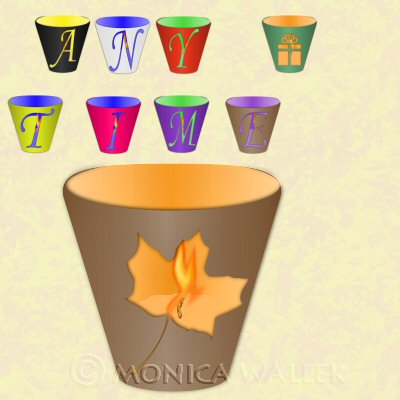
Any Time Tea Light
"Any Time" because you can trade out the colors, symbols or text you use on the cups for any occasion. Be sure to experiment for each holiday! You'll be using my canvas file, PSP 7 or 8, and the fonts or symbols of your choice. You should be familiar with the text, flood, and mover tools. You should expect to use the drop shadow, layers, load selections and various other tools. Animation will NOT be covered in this tutorial, so if you need a hint, check my Rain Tutorial under the raining lighthouse image.

Sources
You'll need my canvas file and the colors file here or choose your own colors.
You will provide the fonts/shapes, etc. for cutouts.
Color choices for the outside, any non-white color*. Inside can be a complementary non-white color*. *Desperately want to use white? Change Fading White gradient to Fading Foreground and set foreground to a shade of gray. You might want to use Gamma correction, sliding linked bars to right. *For black, Colorize 0,0 then gamma correct as for white, but move slider left. If you have created an appropriate candle from one of the numerous tuts on the web, feel free to use it in place of Step 2. Be ready to use the deform tool to make it fit in the area.

You will need to open the canvas file and the color swatch file in whichever version of PSP you will be using.
- Make sure you are on 01 inner layer and Selections->Load from Alpha channel the 01 inner layer selection. Flood the 01 lower inner layer with the outside color you chose. Keep selected, set foreground to gradient, choose the linear gradient with settings of: 1 repeat, inverted, angle 90, and the Fading White gradient. Add new layer. Fill the selection and lower layer opacity to 54. Selections->select none. Merge visible only these 2 layers.
- Make sure you are on the 02 candle layer. Using a brush, solid and small enough to stay inside the cup area, paint in your candle. Amount you need to paint out depends on the symbol you choose for a cutout. I chose a lighter color for my candle from my inside color. Select none.
- Make sure you are on the 03 wick layer. Using your tube tool set to size 20 and rope tube, draw out the wick.
- Make sure you are on the 04 Flame layer. Using the Fire tube set to size 36, place a flame on the wick. I had to use the mover tool to get it just right.
- Make sure you are on the 05 outer layer. Load the 01 lower inner selection again. Set your foreground color to brown and fill the selection. Change foreground to gradient, choose the linear gradient option with settings:angle=270, Fading White, 1 repeat, no invert. Add new layer. Fill selection. Adjust layer opacity down to 42.Selections->Select none. For only these 2 layers, merge visible. Load the 02 inner top selection while still on this merged layer. Press Delete key once to get rid of the top. Select none.
- You might want to save the file and work on a copy now, to avoid repeating the steps for every new holder. Just colorize the relevant items (01, 05, and your candle) for a new look.
- On a new layer (top of the pile), place your shape or font. Make a selection from it. Make sure you are on the 05 outside layer, click delete key once to create the cutout.
- You can also apply other cutouts to the inner layers, experiment!
- I used a -1,1 dropshadow set to 50 opacity and 5 blur on any layers with cutouts. Apply again, switching the negative and positive.
- Line art works quite well for this, or make a selection from a JASC shape.


PSP7 tool icons are from MaMaT's icon tubes.
"PSP" refers to
CorelTM Paint ShopTM Pro®.
The individual creators own the copyrights and/or trademarks on their respective software filters, fonts, presets, Quick Guides, scripts, magazines, and images/banners which are mentioned or appear on these pages.
Customizable layout provided by Blue Robot CSS layouts. Note that I changed the colors, background and customized the CSS for my site.
© Copyright 2001-2011, Monica Wallek, All rights reserved.
Using my tutorial, means you agreed to these usage terms. All page elements, tutorials, and explanatory and sample graphics belong to me except where otherwise noted.
