Spring Globe PSP7
I saw a cute little candy holder in a catalog and decided to try making something similar with vectors. Here is the result. Some one pointed out that it was a wonderful globe. This is my first vector lesson, and I think this little bug may win you over to vectors or at least warm up your attitude toward them. Many thanks to the testers who found the problems I wrote into this lesson.
You'll notice that this lesson is specific to PSP7. Unfortunately, PSP6 is missing the majority of the preset shapes used in this lesson and changes the vectors from PSP7 too much to follow this lesson.
Before you all panic over that vector word, know that in this lesson, if you can resize[no nodes involved], hide vector layers[still no nodes], change the vector fill[still no nodes], mess with groups and use the Bezier curve in vector mode, you will not node edit.
If you need an introduction to vectors before you try this lesson, I learned from Char.

Supplies
I am not providing any supplies for this lesson.
However, if you are missing the extra free files Jasc provides, you'll find the free Jasc files here. The files include the Cylinder, Sphere, Drop, Heart and Antennae shapes used in this lesson. Why not grab all the free stuff there? We'll wait for you.
- Open a new 350x350 transparent 16.7 million color image.
- We will be using the preset shapes tool
 for this lesson unless otherwise noted. You will need to set it on Vector and retain style.
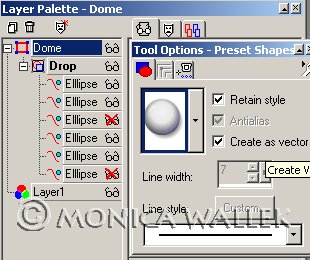
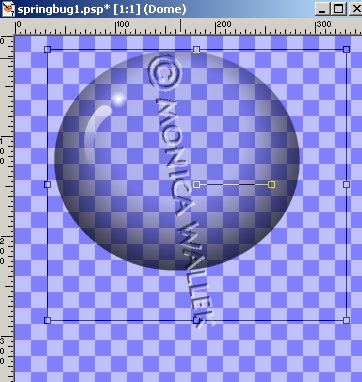
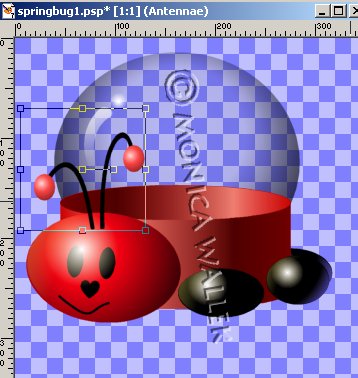
 - Add new vector layer, Dome. Draw out a Drop shape. The size you make your dome determines the width of your next shape. Open your Drop group and click on the 3rd Ellipse from the top. Hide the layer. (This gets rid of the odd blue tone.) Hide the bottom Ellipse layer as well. (It makes a cloudy area later when you try to fill the globe.)
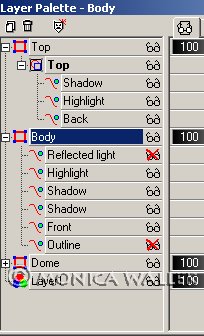
- Add new vector layer, Body. Draw out a Cylinder for the body. Try to get it the exact same width as your Dome. Hide the Reflected light layer. Ungroup the cylinder. (Open the Body vector and click on the Cylinder group. Right mouse click on the Ungroup Option.)
Now, group the top 3 parts only as Top group. (If your cylinder parts do not match my screen shot, take the first 4 parts, instead of the first 3, into the Top group.) (To group, hold shift key down while clicking on each addition to group. When finished choosing, release shift key and right mousclick and choose Group option.) You need to move this group onto a new vector layer. I named my new layer Top.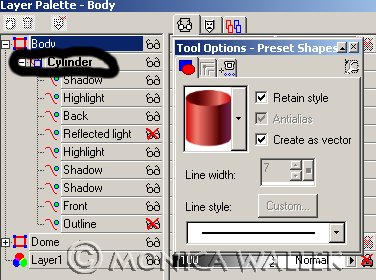
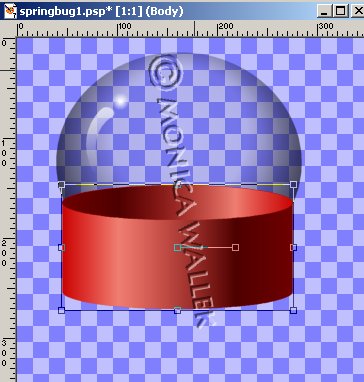
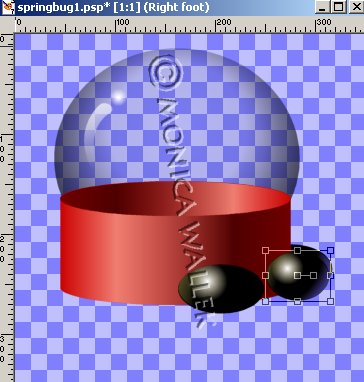
- Add new vector layer, Left Foot. Draw out a small oval Sphere and rename Left Foot. Open the group and click on Circle. Right click and choose properties to change the fill color to black.
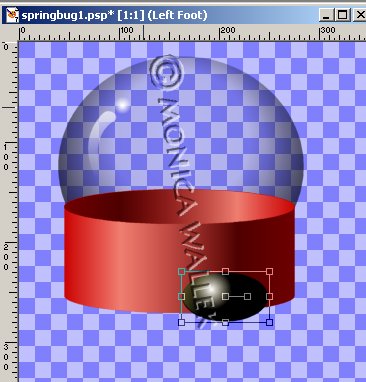
- Copy your foot and paste into new vector layer. Rename as Right Back Foot. Move this layer down below your Body.
- Paste your foot one more time. Rename it Right foot. I pushed in the left side to make it more of a ball.) Move it so it's slightly lower and to the left, but still overlapping the right back foot. (This is the only way I could get the foot to look like it wrapped around the body.)
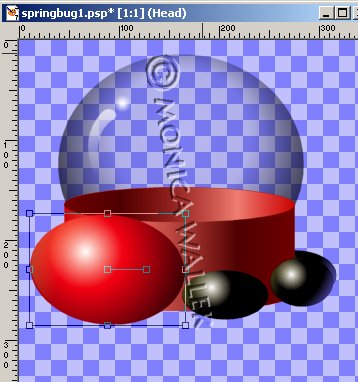
- Add new vector layer, Head. Make another Sphere for your head. (Try for a larger oval.) The blue tinge bothers me, so I hide the Blue.
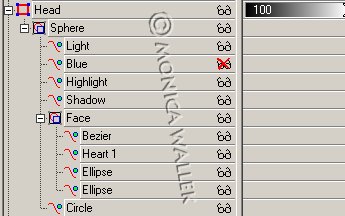
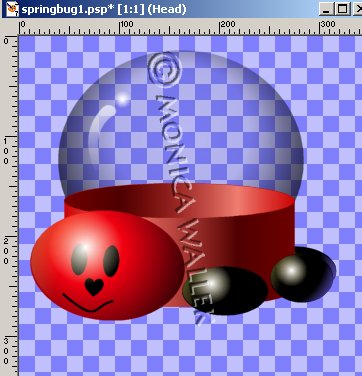
- Do not add a new layer! Now, we need a face. I used 2 Ellipses for eyes, a heart for the nose and a vector bezier curve
 for the mouth. (Bezier means no node editing.) (You should see black outlines for eyes. You will need to get to the ellipse properties and change the fill color to black.) I did group these together and renamed Face. I moved the Face group down below the Shadow in the Head layer. (Now, the highlight is actually over the face.)
- Add new vector layer, Antennae. Choose the Antennae shape. I changed the bottom drawing layer from green to black and the 3rd and 6th Ellipse to red.
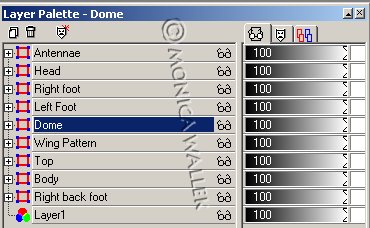
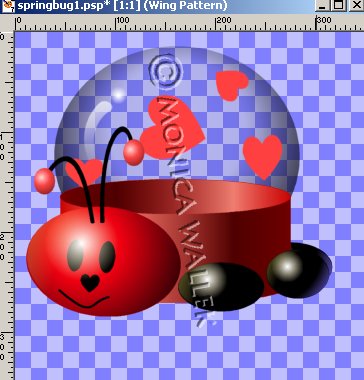
- Add a new vector layer, Wing Pattern. I used that heart shape again to make the spots. You'll need to rearrange your vector layers as shown in the image below.
- Your vector globe is finished. Save your work as a .psp file. We can't fill it while it's a vector. Believe me, I spent a day trying! You may wish to work on a copy of this image when you do the next step. You can reuse your vectors for another project so you can reuse the original without recreating it.
- Convert your Body layer to raster. Before you convert your Top layer, make a vector selection of it and save to disk. (To make a vector selection: open the Top layer and click on the Top group you made. Go to Selections->From Vector object. Return to Selections->Save to disk and name it top.) (This means you don't have to node edit the cylinder.) Convert all layers to raster.
- On your Body layer, load the Top.sel file you made. Hit delete. You will need to erase
 the slight line left behind your Dome. Select your Body now and click on your Dome layer. Hit delete key once.
 - Add a new raster layer, Contents, below your Wing Pattern layer.
- Add the contents of your choice. Click on your Body layer and select the image there. Click back on Contents layer and hit Delete key once. You will need to manually erase any remaining contents left outside the Dome. You should have everything inside the glass now.
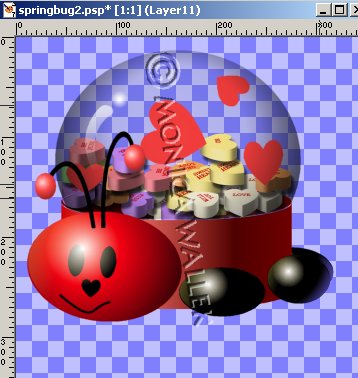
- Save your image. You're done here.
Samples
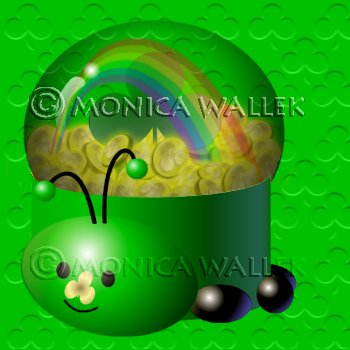
I just changed the Head, Body and antennae ball colors to green. Swapped the heart for an edited club, but you could use a font and avoid the editing.
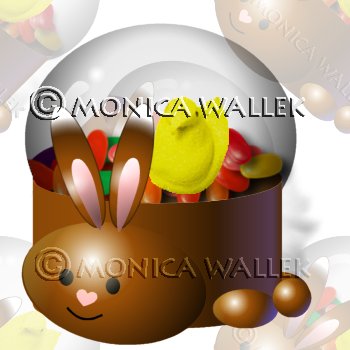
Awww, used the same button for inner and outer ears. Changed his color again to brown. Added the Clouds tube for a cottony tail.
Tube sources: Jasc Picture Tube Download.
Dizzinz chick tube
Hood's Tubes which has now closed down.


PSP7 tool icons are from MaMaT's icon tubes.
"PSP" refers to
CorelTM Paint ShopTM Pro®.
The individual creators own the copyrights and/or trademarks on their respective software filters, fonts, presets, Quick Guides, scripts, magazines, and images/banners which are mentioned or appear on these pages.
Customizable layout provided by Blue Robot CSS layouts. Note that I changed the colors, background and customized the CSS for my site.
© Copyright 2001-2011, Monica Wallek, All rights reserved.
Using my tutorial, means you agreed to these usage terms. All page elements, tutorials, and explanatory and sample graphics belong to me except where otherwise noted.
![]()