Icy Beads in PSP8
Holiday time again, and I found a nifty way to create the look of ice beads in PSP8 (no effect in PSP7 or lower) with very little effort. You use my preset to create the beads from a PSP effect, no outside plugins. For variety, you can apply the deform tool or the mesh warp tool to create an endless supply of these beads.

Sources
I am providing my Preset. You'll need to place it in your My Documents/My PSP8 Files/Presets folder. (Nope, not in either of the scripts folders or the preset shapes folder. Nope, not in the Jasc programs folder either.) [If you see extra supplies, don't worry, I just included at least one of my psp files with the layout guide for a horribly tedious decorative garland made of beads. Create new layers. Tube on top of guide lines.]
NOTE: If you did not purchase the full cd version, please visit the Jasc component downloads page to make sure you have all the necessary files required by the preset I provide. I cannot legally redistribute the JASC extras files. NOTE2: Current release of PSP is 8.1 as of October 13, 2003.

- Open a new transparent background square image. Mine was 400x400, but I like them big for my eyes.
- Here's the "hard" part. Effects->Artistic Effects->Balls and Bubbles. In the preset area of the window (top), load my MW ice garland preset. [For the curious, I played with the .bmp and environment map file paths under the "maps" tab. Then under "illumination" tab, I changed the color of each light to what you see and made some backlit.]
- Congratulations, you now have a round bead to save a copy of and tube.
- On a copy of that round bead, choose the Deform tool from the second tool group either on the left or from the left side. We will be squooshing in both vertical sides of the deform box to create a tube bead. Click on the left middle node and drag toward center of bead. Repeat the same step and same amount for the right side. (Click any other tool to finish the deform.)Instant tube bead. Be sure to save a copy of this bead and/or tube it.
- On a copy of that last bead you made,
go back up to the deform tools' group, and find the Mesh Warp tool in there.
Window should look like a vector-phobes' worst nightmare, but do not panic!
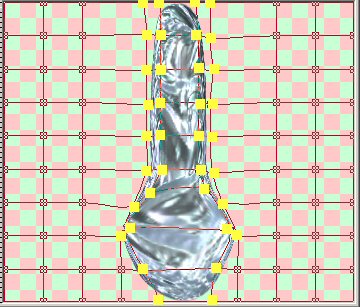
Using my screen shot as a guide, move the marked nodes as directed.
 Your image (just a preview for now) should get distorted around those nodes only.
 - We are trying for a tear drop or icicle shape or something similar. When you like the preview, click on the blue check mark in the tool ribbon to apply and finish your warp.
- Save/tube this image.
- Originally, I created these beads to use in a garland for a holiday tree. I found setting the layer opacity to 40 something made the beads look icily transparent. ;)
- If you choose to use the garland guide, expect to kill several hours placing the beads.


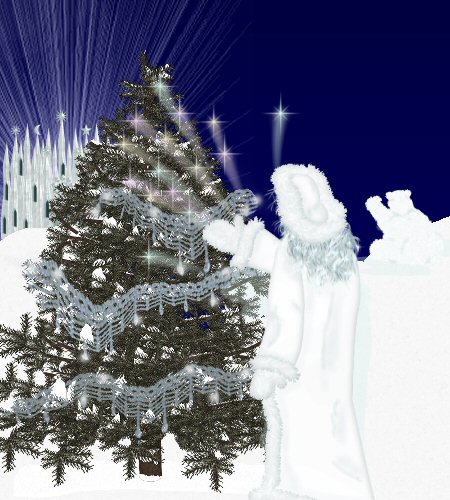
Thought you'd like to see the swag on a tree. Thanks Ronni for the tree, Snow Queen, bear and ice castle! I used the mesh warp tool on the swag on a new layer, then erased the excess swag.


PSP7 tool icons are from MaMaT's icon tubes.
"PSP" refers to
CorelTM Paint ShopTM Pro®.
The individual creators own the copyrights and/or trademarks on their respective software filters, fonts, presets, Quick Guides, scripts, magazines, and images/banners which are mentioned or appear on these pages.
Customizable layout provided by Blue Robot CSS layouts. Note that I changed the colors, background and customized the CSS for my site.
© Copyright 2001-2011, Monica Wallek, All rights reserved.
Using my tutorial, means you agreed to these usage terms. All page elements, tutorials, and explanatory and sample graphics belong to me except where otherwise noted.
