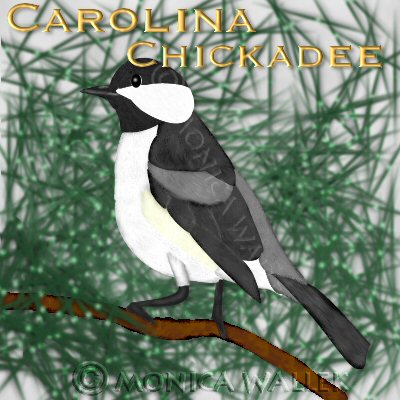
Carolina Chickadee PSP7-8
This is a special tutorial just for those folks who do take the time to email me with questions or thanks. You'll be using my canvas and colors files to create a Carolina Chickadee, another common bird in my area. You should be familiar with the smudge/lighten/darken tools in addition to using alpha channel selections.

Sources
You will need my canvas and colors files available here.
PSP7 users please note that the Lighten/Darken settings are found in the Retouch tool options. You may wish to use the soften setting to give your finished image a look more like the PSP8 finished image.
Keep in mind that your results will vary every time you try using the lighten, darken, smudge and soften tools.
Remember to save often!
Why you won't see any specific Lighten/Darken settings.
The more you repeatedly go over an area with either brush, the darker it gets with darkening and lighter it gets with lightening. If we pretend I give you the exact settings I used, you still won't get the exact same results I got *that* particular time. I get very different results with the same settings on the same day. I suspect those of you uncomfortable with this tool and other similar tools do not trust your own eyes. You will need to trust your own artistic judgement. Once I learned to do that myself, my own retouch tool group work improved to my own eyes. I will give you rough settings: hardness and density less than 50.

You will need to open the canvas file and the color swatch file in whichever version of PSP you will be using.
- Make sure you are on the 01 layer. Selections->load from alpha channel the 01 file. Flood with the black color. Use the lighten tool to highlight the middle of the legs. Selections->Select none.
- Make sure you are on the 02 layer and load the matching selection. Flood with the buff color. Use the darken tool around the right outer edge and both lighten and darken in middle. Selections->Select none.
- Make sure you are on the 03 layer and load the matching selection. Flood with white. Use the darken tool around the outer edge and randomly in center. Selections->Select none.
- Make sure you are on the 04 layer and load the matching selection. Flood with white color. Use the darken tool as described above in step 3. Selections->Select none.
- Make sure you are on the 05 layer and load the matching selection. Flood with white. Use the darken tool as described above. Selections->Select none.
- Make sure you are on the 06 layer and load the matching selection. Flood with light gray color. Use the lighten and darken tools as described above. Selections->Select none.
- Make sure you are on the 07 layer and load the matching selection. Flood with dark gray color. Use the lighten and darken tools as described above. Selections->Select none.
- Make sure you are on the 08 layer and load the matching selection. Flood with light gray color. Use the lighten and darken tools as described above. Selections->Select none.
- Make sure you are on the 09 layer and load the matching selection. Flood with dark gray color. Use the lighten and darken tools as described above. I did use the lighten tool to add some feather outlines as well. (click, drag, release in direction of feathers.) Selections->Select none.
- Make sure you are on the 10 layer and load the matching selection. Flood with light gray color. Use the lighten and darken tools as described above. Selections->Select none.
- Make sure you are on the 11 layer and load the matching selection. Flood with dark gray color. Use the lighten and darken tools as described above. Selections->Select none.
- Make sure you are on the 12 layer and load the matching selection. Flood with black color. Use the lighten tool as described above in step 1. Selections->Select none.
- Make sure you are on the 13 layer and load the matching selection. Flood with black. Use the lighten tool as described above. Selections->Select none.
- Make sure you are on the 14 layer and load the matching selection. Flood with white color. Use the darken sparingly only in the center and then smudge for feather look. Selections->Select none.
- Check over your image. Last chance for smoothing or smudging on eadge layer! (Bad lighten/darken day for me, I smudged mine for better blended look.) Merge Visible.
- Reveal the Eye layer.
- Save your image.


PSP7 tool icons are from MaMaT's icon tubes.
"PSP" refers to
CorelTM Paint ShopTM Pro®.
The individual creators own the copyrights and/or trademarks on their respective software filters, fonts, presets, Quick Guides, scripts, magazines, and images/banners which are mentioned or appear on these pages.
Customizable layout provided by Blue Robot CSS layouts. Note that I changed the colors, background and customized the CSS for my site.
© Copyright 2001-2011, Monica Wallek, All rights reserved.
Using my tutorial, means you agreed to these usage terms. All page elements, tutorials, and explanatory and sample graphics belong to me except where otherwise noted.
