This was written for that cotton candy lover many of us know and by request
from a group of prestigious people. I am so honored to be asked to write
this. As a precaution, work through this lesson on a full stomach, please. This
lesson does not use outside filters. You can always choose to do so. If you have
preset shapes in your version of PSP, you should be able to do this lesson. While
you will see the "vector" word in one spot, NO node editing. You just hide a
vector layer and then convert to raster.
The font I used is called Tropicana and can be found on Listemageren's site.
PSP7 tool icons are from MaMaT's icon tubes.

Please note: Anything you create from this tutorial is for your personal use only.
All files, screenshots, and text instructions I provide are mine
under copyright law, excluding other authors' work where noted.
Supplies
Download my Lesson Supplies here.
PSP6 users will need this file, since you are missing the cone preset shape.
You will start following the lesson at Step 5 because v6 also doesn't support
all the vector options that v7 has.
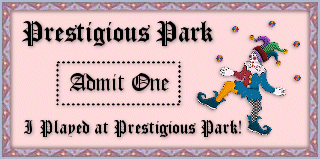
As a special gift, you'll find your 'Prestigious Park participation picture'
(shown below) included in the supplies file. Please feel free to use the image on
your own pages after completing this lesson.
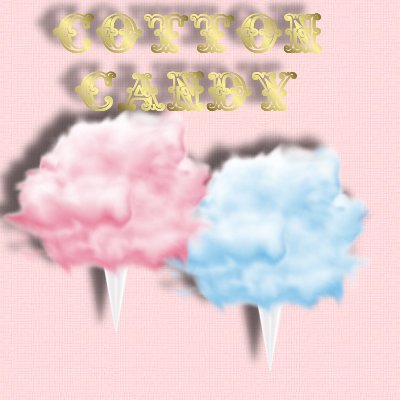
1. Open a new transparent 350 x 350, 16.7 million color image.
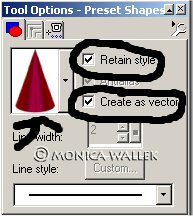
2. Click on Preset Shapes tool  and choose Cone. Make sure Retain Style and
Create as Vector are checked. Don't panic-it will be gone soon.
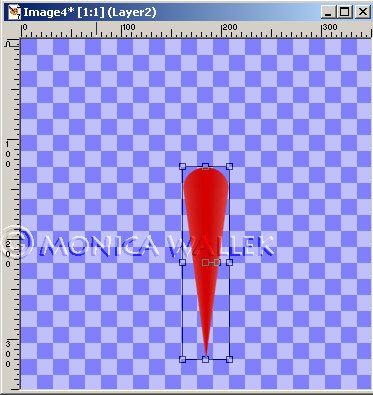
Now, start down near 160,320 and hold mouse down while dragging up and over to
around 223,129. This makes that cone point down.
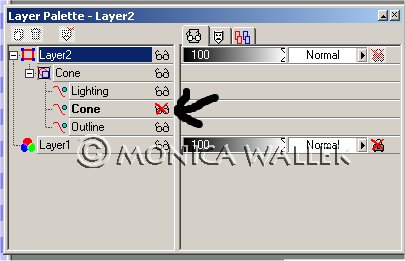
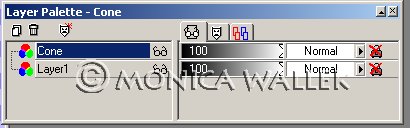
3. Click on Vector layer and open it. Click on Cone layer and open it to
find the Cone layer inside. You want to hide that layer. You just made the
red vanish.
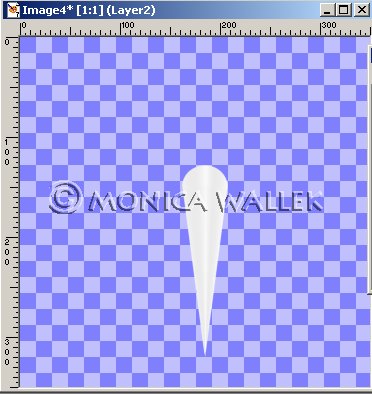
4. Convert Layer2 to Raster layer and rename Cone. Now, that was painless!
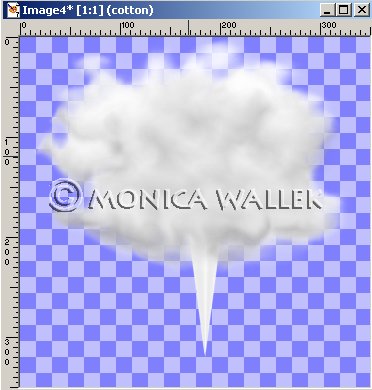
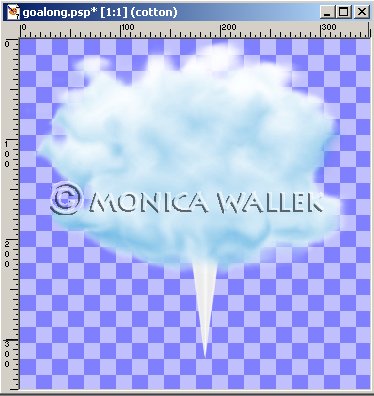
5. Add new layer, Cotton.
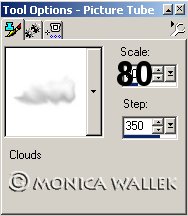
6. Choose the Jasc Clouds tube  in your tube options window. Scale 80.
7. Now, add clouds to hide the top of the cone, until you like the look.
Each of my batches looks different and "eaten on" can be the perfect look....
For a fuller look, duplicate the Cotton layer and merge both Cotton
layers together. Then rename as Cotton.
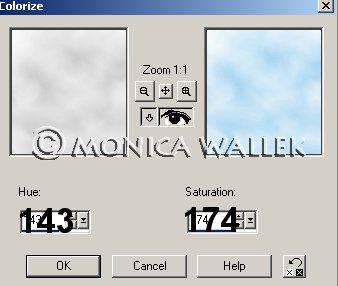
8. Now, we color the candy. Go up to Colors->Colorize. I've seen blue or pink
around here, but you can try other colors.
my blue: hue=143, saturation=174
my pink: hue=244, saturation=174

Have a question?
E-mail me and place "Cotton" in the subject line if you want a response.
(My filters at this address are set to specific key words to control spam --
anything else gets filed in the trash can unread.)
Circus Graphics ©Copyrighted Prestigious Dames & Prestigious PSP 2002
Tutorials are ©Copyrighted by each Author
© Tutorial ©Copyrighted 2001-2002, Monica Wallek, All rights reserved.
You have the right to use the graphics you create from my tutorials for your
personal use only. Using my tutorial, signifies your agreement to my usage terms.
Groups may only link to my tutorial pages. All page elements (except Circus Graphics),
tutorials, and explanatory and sample graphics belong to me. Any removal, distribution,
profiting, storage or transmission of my materials, is a violation of my copyright
and will result in legal action.

Report Tut Thieves