1. Open a new 450x450 transparent 16.7 million color image. Yes, that's huge.
You'll need to resize this later.
You are welcome to try other colors for your Spring Chick.
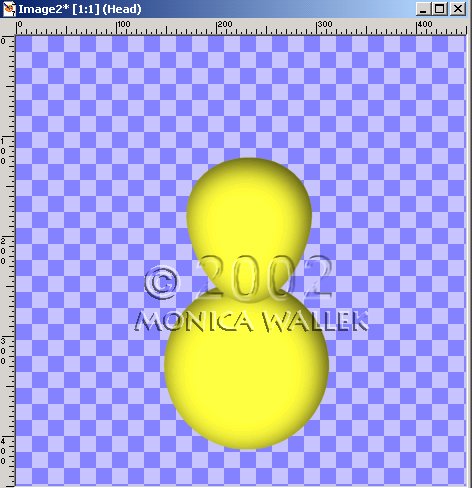
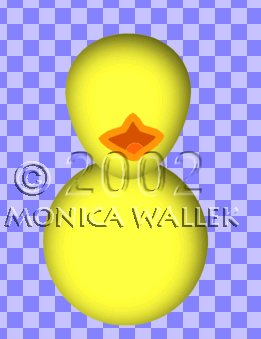
2. Add a new raster layer, Tummy. Selections->Load from disk the tummy.sel file.
Flood fill  with #FFFF40. Selections->Invert.
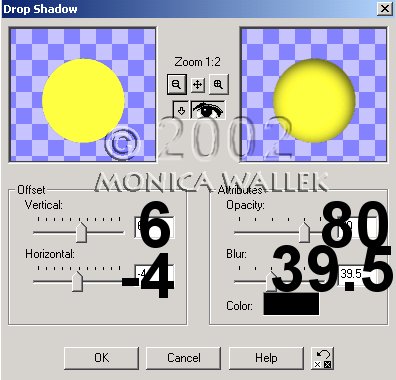
Go to Effects->3D->Drop Shadow and use my settings below. Select none.
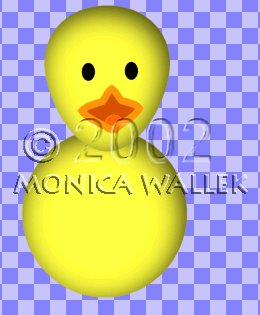
3. Add new layer, Head. Selections->Load from disk the head.sel file.
Flood fill with #FFFF40. Selections->Invert.
Go to Effects->3D->Drop Shadow and use same settings. Select none.
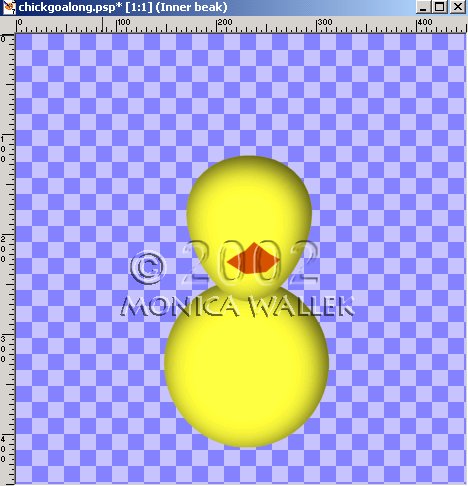
4. Add new layer, Inner Beak. Selections->Load from disk the innerbeak.sel file.
Flood fill with #D55203. Select none.
5. Add new layer, Tongue. Selections->Load from disk the tongue.sel file.
Flood fill with #F9650B. Select none.
6. Add new layer, Outer Beak. Selections->Load from disk the outerbeak.sel file.
Flood fill with #F9970B. Select none.
7. Add new layer, Eyes. Selections->Load from disk the chickeyes.sel file.
Flood fill with black. Select none.
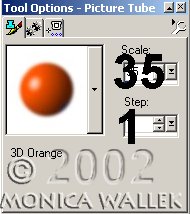
8. Now, it's your turn to draw the springs for the bear's arms and legs.
Wait, before you run off and give up, you'll be using a tube for all the shading.
Click on your tube tool  and choose the 3D Orange tube.
On new layers, Spring Wings and Spring Legs, draw the spring legs and arms.
When you're done, go to Colors->Colorize and
choose 45,255 for the wings and 25,243 for the legs.
Don't panic, you can claim the spring is stretched more or less
if your mouse control is not so good today. Move these layers below your chick layers.
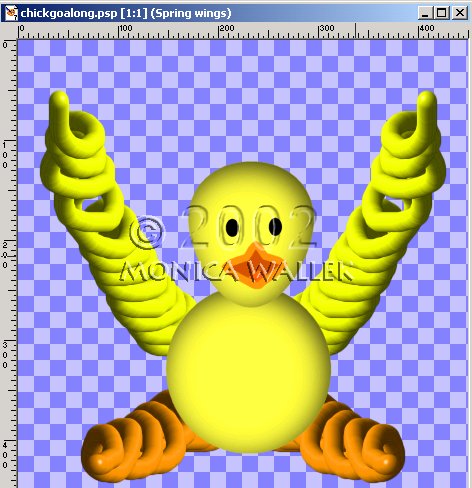
9. Add new layer, Hands. Load the Hand.sel file and flood fill with #FFFF40.
Invert the selection and apply the same drop shadow. Select none.
Move  into position over left spring arm.
Layer->Duplicate. Image->Mirror the copy. Effects->Sharpen.
Reposition if needed.
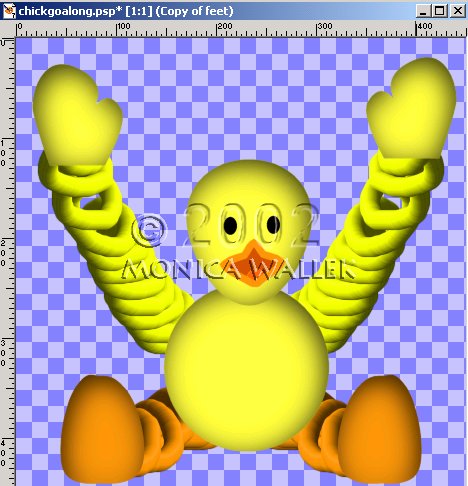
10. Add new layer, Feet. Load the foot.sel file and flood fill with #F9970B.
Invert and apply the same Drop shadow. Select none.
Move into position over left spring leg.
Layer->Duplicate. Image->Mirror the copy. Effects->Sharpen.
Reposition if needed.
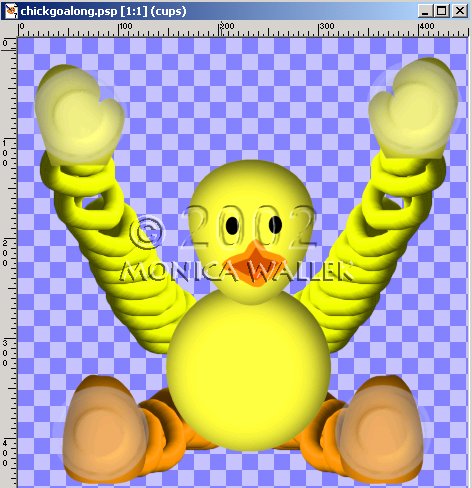
11. Add a new layer, Cups. Open my suctioncup.psp file and
copy and paste the suction cup over each hand and foot.
I adjusted my layer opacity down to around 50%.
PSP7 tool icons are from MaMaT's icon tubes.
Should I egg you on?

 email Monica
Graphics ©Copyrighted Prestigious Dames & Prestigious PSP 2002
Tutorials are ©Copyrighted by each Author
Tutorial ©Copyrighted 2002, Monica Wallek, All rights reserved.
You have the right to use the graphics you create from my tutorials for your
personal use only. Using my tutorial, signifies your agreement to my usage terms.
Groups may only link to my tutorial pages. All tutorials, and
explanatory and sample graphics belong to me. Any removal, distribution, profiting,
storage or transmission of my materials, is a violation of my copyright and will
result in legal action.

Report Tut Thieves